
什么是Nexus
Nexus是一个强大的Maven仓库管理器,它极大地简化了自己内部仓库的维护和外部仓库的访问。利用Nexus你可以只在一个地方就能够完全控制访问 和部署在你所维护仓库中的每个Artifact。Nexus是一套“开箱即用”的系统不需要数据库,它使用文件系统加Lucene来组织数据。Nexus 使用ExtJS来开发界面,利用Restlet来提供完整的REST APIs,通过m2eclipse与Eclipse集成使用。Nexus支持WebDAV与LDAP安全身份认证。
一、Nexus安装
1、安装方式一
使用
nexus-builder.yaml(见本文末尾)文件进行安装:1
2
3
4$ kubectl create -f ./nexus-builder.yaml
namespace "nexus" created
deployment "nexus3" created
service "nexus3" created安装完成后,查找对应端口进行访问:
1
2
3
4
$ kubectl describe svc -n nexus nexus3 | grep 'NodePort:'
NodePort: <unset> 32139/TCP
$ hostname -i
192.168.56.11恭喜你,已完成Nexus3的安装,接下来你就可以进行访问了
192.168.56.11:32139。
Note:如果页面无法访问,请等待几分钟后再刷新页面。
2、安装方式二
- 执行脚本
nexus-builder.sh(见本文末尾)进行安装:1
2
3
4
5
6$ kubectl create -f ./run.sh
namespace "nexus" created
deployment "nexus3" created
service "nexus3" created
Now Nexus running on k8s-worker2 : 192.168.56.11:32139
Note:If the page can't be accessed,please wait a few minutes and refresh the page.
参考资料:sonatype/nexus3 - Docker Hub
二、用户操作界面
1、用户登录
- 根据上面的地址打开用户界面。点击右上角
Sign in登陆,默认账号admin,密码admin123。
2、修改用户密码
为了系统的安全性考虑,请及时修改密码,下面我们以默认账号
admin为例进行修改,在配置页面,选择Security - User,点击用户列表admin。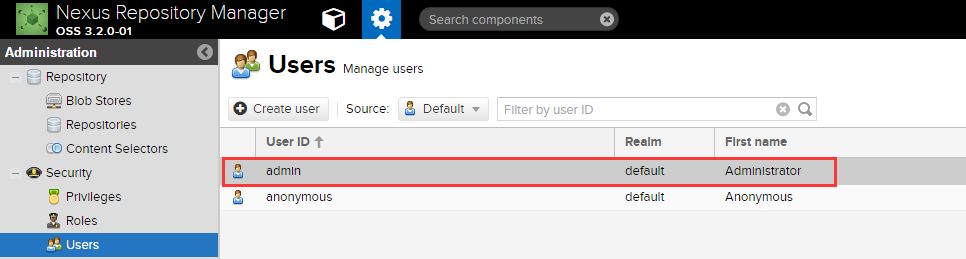
进入后选择
More - Change password进行密码修改。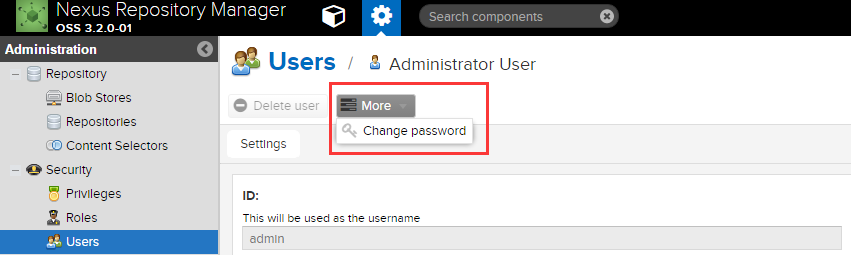
3、创建maven仓库
在配置界面,选择
Repository - repositories,图中红色选线框着的是默认仓库。点击Create repository。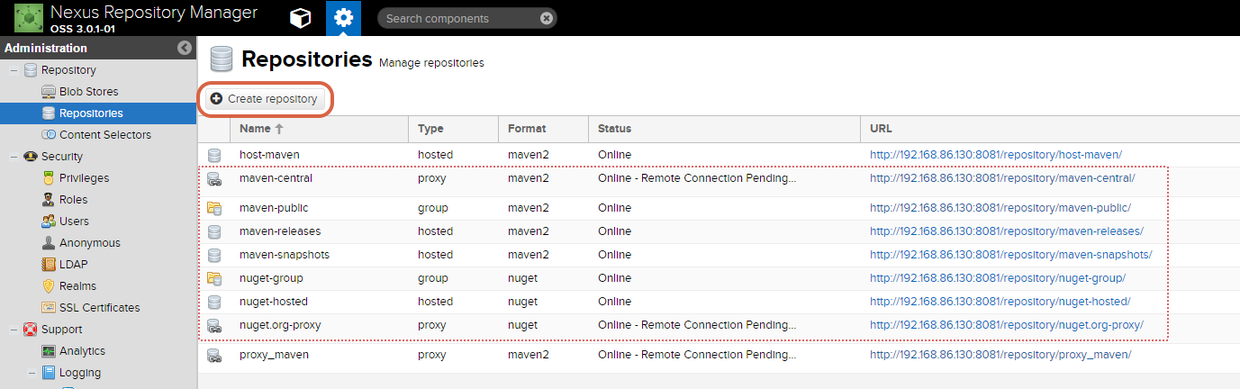
我们的目的仅仅管理自己开发的组件,选择
maven2(hosted)即可。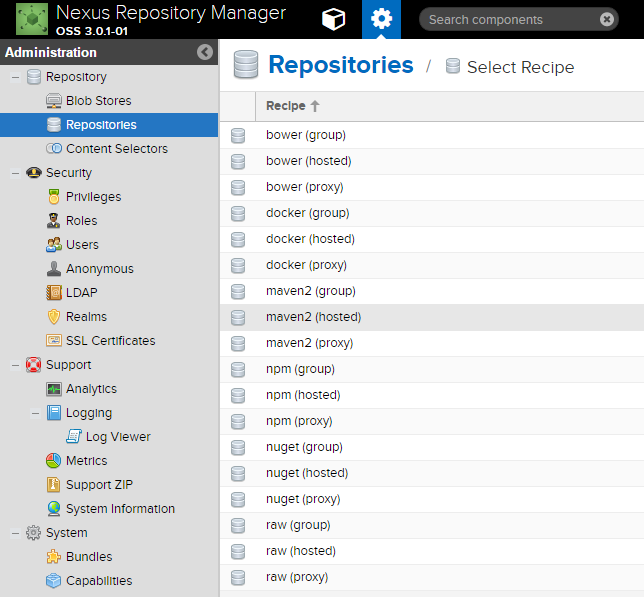
填写仓库配置,
Deployment policy选择Allow redeploy。
version policy,可以选Release或Snapshot,如果仓库开放给所有人,那选Release比较好,如果公司内部或自己用,其中一个都可以。
- 仓库
Hand-repository创建完毕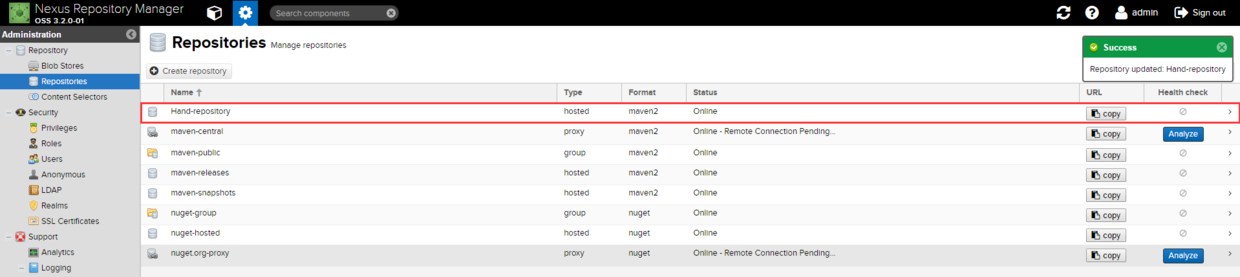
4、创建角色
在配置页面,选择
Security - Roles,点击Nexus role: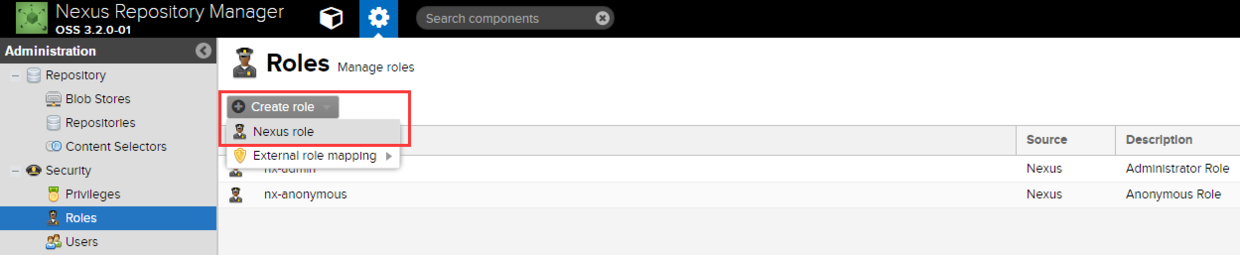
填写角色配置,根据所需的权限进行添加权限,然后点击
Create role: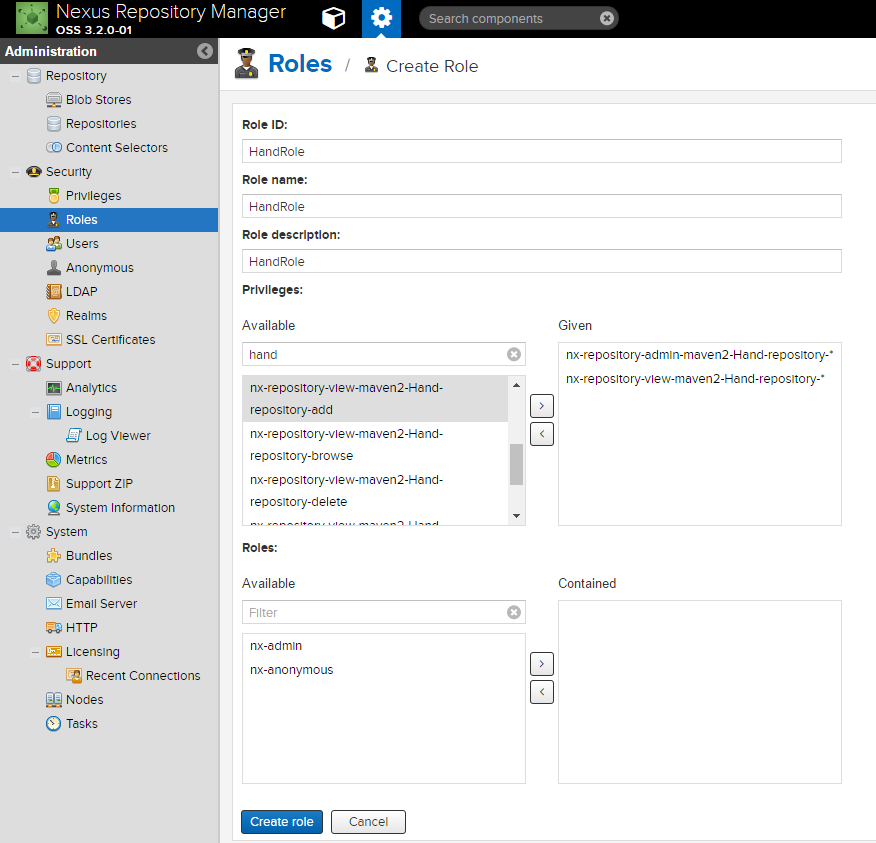

5、创建用户
在配置页面,选择
Security - User,点击Create user: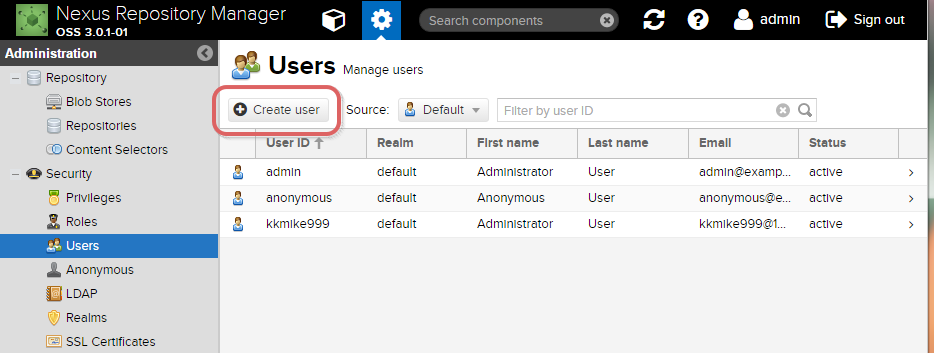
填写用户信息,再点击最底下的
Create user即可创建用户,注意如果启用此帐号,Status选择Active。

创建HandUser用户后,可以
Sign out,用HandUser账号登陆了。
三、工作空间设置
1、给单一项目设置远程仓库
在Maven project中的
pom.xml文件添加以下信息1
2
3
4
5
6
7
8<repositories>
<repository>
<id>nexus</id>
<name>Nexus3 Repository</name>
<!-- 此为仓库地址,应用 group 类型可以相当于同时添加多个仓库地址 -->
<url>http://192.168.56.11:32139/repository/maven-public/</url>
</repository>
</repositories>代码中
url标签的路径在Repositories中选择需要的仓库,点击URL字段下的copy进行复制。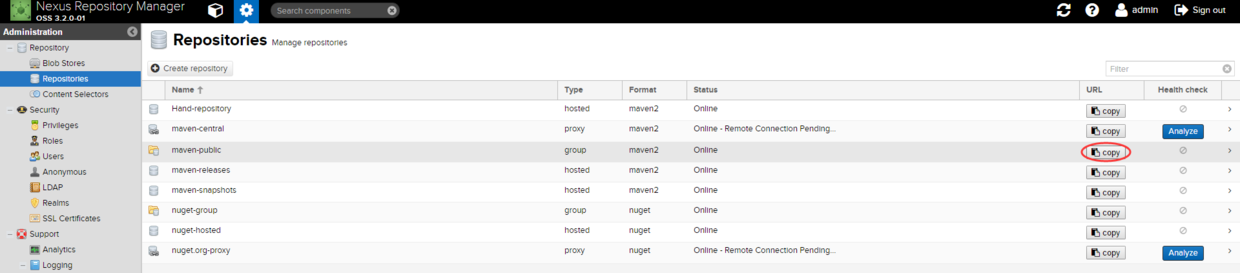
2、设置所有项目远程仓库
全局配置文件在Maven安装目录conf文件夹中settings.xml,当前用户配置文件在本地仓库中的settings.xml。若更改当前用户配置信息无效,则修改全局配置信息。
1、在本地仓库文件夹下,给
settings.xml文件添加以下信息1
2
3
4
5
6
7
8
9
10
11
12
13
14
15
16
17
18
19
20
21
22
23<profiles>
<profile>
<id>NexusRepo</id>
<repositories>
<repository>
<id>nexus</id>
<name>Nexus3 Repository</name>
<url>http://192.168.56.11:32139/repository/maven-public/</url>
<releases>
<enabled>true</enabled>
</releases>
<!-- snapshots默认是关闭的,需要手动开启 -->
<snapshots>
<enabled>true</enabled>
</snapshots>
</repository>
</repositories>
</profile>
</profiles>
<!-- 只有激活后才生效,此代码为激活代码 -->
<activeProfiles>
<activeProfile>NexusRepo</activeProfile>
</activeProfiles>- 此种方法如果远程仓库关闭或意外退出,在maven构建时会到中央仓库去查找jar包
2、在本地仓库文件夹下,给
settings.xml文件添加以下信息1
2
3
4
5
6
7
8
9
10<!-- 工厂的镜像,只要mirrorOf中的工厂要被访问,都会自动来找镜像,如果无法访问就不会再去中央工厂,推荐这个配置 -->
<mirrors>
<mirror>
<id>nexusMirror</id>
<!-- *号代表所有仓库,此处也可以单独设置,以逗号隔开 -->
<mirrorOf>*</mirrorOf>
<name>Human Readable Name for this Mirror.</name>
<url>http://192.168.56.11:32139/repository/maven-public/</url>
</mirror>
</mirrors>- 添加此配置信息后,上面(1)中的配置将失效
- Maven构建时可能会出现报错信息,尝试更新索引文件
3、Maven默认是无法下载中央仓库snapshots版本jar包的,通过以下设置即可下载
1 | <profiles> |
三、发布jar包
配置
pom.xml文件,添加以下代码:1
2
3
4
5
6
7
8
9
10
11
12<distributionManagement>
<repository>
<id>maven-releases</id>
<name>maven releases</name>
<url>http://192.168.56.11:32139/repository/maven-releases/</url>
</repository>
<snapshotRepository>
<id>maven-snapshots</id>
<name>maven snapshots</name>
<url>http://192.168.56.11:32139/repository/maven-snapshots/</url>
</snapshotRepository>
</distributionManagement>配置
settings.xml文件添加以下代码:1
2
3
4
5
6
7
8
9
10
11
12<servers>
<server>
<id>maven-releases</id>
<username>admin</username>
<password>admin123</password>
</server>
<server>
<id>maven-snapshots</id>
<username>admin</username>
<password>admin123</password>
</server>
</servers>执行
clean deploy语句,进行构建上传。
Nexus相关信息
这里简单介绍下几种repository的类型:
- hosted,本地仓库,通常我们会部署自己的构件到这一类型的仓库。比如公司的第二方库。
- proxy,代理仓库,它们被用来代理远程的公共仓库,如maven中央仓库。
- group,仓库组,用来合并多个hosted/proxy仓库,当你的项目希望在多个repository使用资源时就不需要多次引用了,只需要引用一个group即可。
Nexus搭建代码清单
nexus-builder.yaml
1 | apiVersion: v1 |
nexus-builder.sh
1 | #!/bin/bash |